Hostinger is a web hosting company that provides affordable and reliable hosting services. It was founded in 2004 in Lithuania and has since grown to become a popular choice for individuals and businesses looking for budget-friendly hosting solutions.
Hosting Plans:
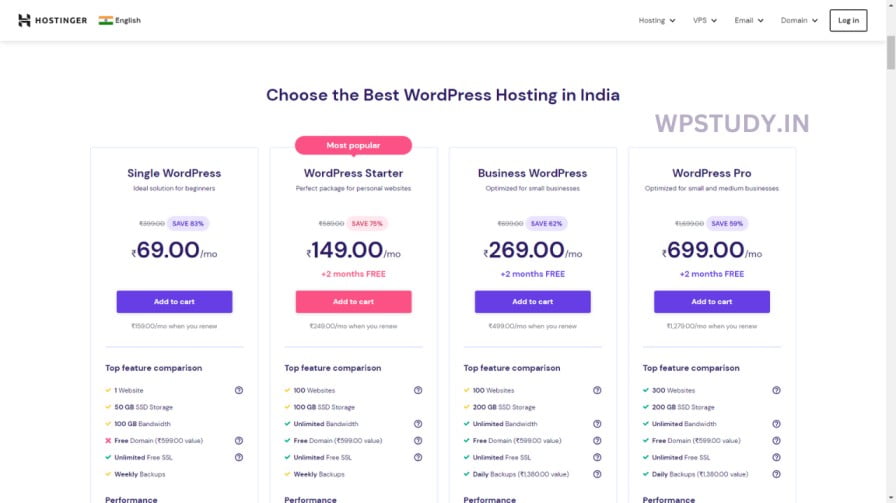
Hostinger offers a variety of hosting plans including shared hosting, VPS hosting, cloud hosting, and WordPress hosting. Their shared hosting plans start at just $0.99 per month and come with a free domain name, unlimited bandwidth, and a website builder.
Features:
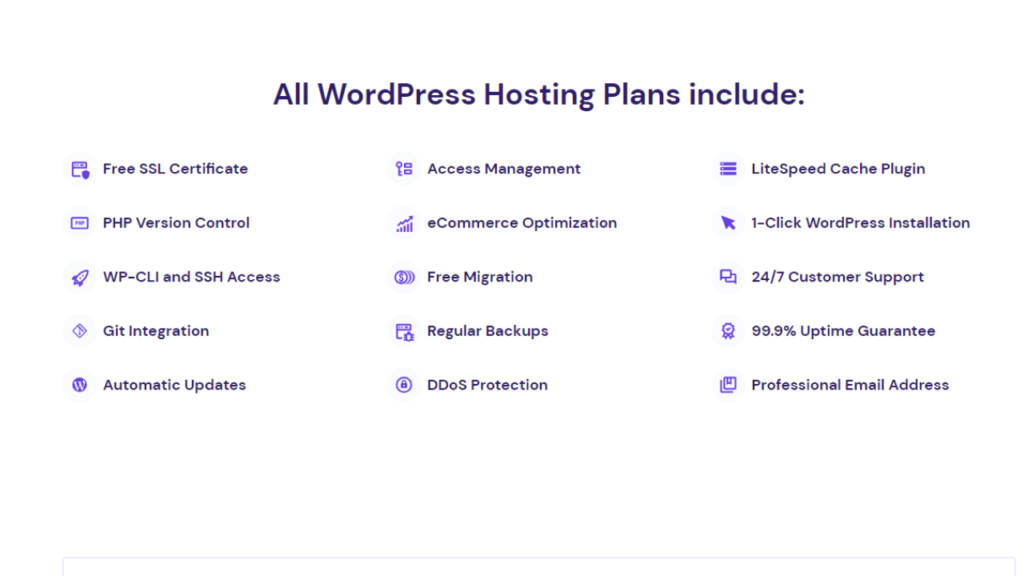
Hostinger’s hosting plans include a range of features such as SSD storage, free SSL certificates, and an easy-to-use control panel. They also offer a 99.9% uptime guarantee and a 30-day money-back guarantee, making it easy to try out their hosting services risk-free.
Performance:
Hostinger’s servers are located in data centers around the world, including the US, Europe, and Asia. This means that they can provide fast loading speeds and low latency to users in different regions. In addition, Hostinger uses the latest technologies such as LiteSpeed caching and HTTP/2 to optimize website performance.
Customer Support:
Hostinger provides 24/7 customer support through live chat and email. They also have a knowledge base and community forums where users can find answers to common questions and get help from other Hostinger users.
How Can We Assist You?
We are here for you 24/7. Our Customer Success Team is called that way for a reason.
Already a client?
Login and reach our Customer Success Team
Sales inquiry
[email protected]
Media (PR)
[email protected]
Lost access to 2FA or Hostinger profile email?
[email protected]
Report abuse
[email protected] or click here
Hostinger Hosting Pros And Cons
Pros
- 1. Affordable pricing
- 2. Good performance and uptime
- 3. Wide range of hosting plans and features
- 4. User-friendly control panel
- 5. 24/7 customer support
Cons
- 1. Limited phone support
- 2. No dedicated hosting plans
Conclusion
Overall, Hostinger is a great option if you’re looking for affordable and reliable web hosting. Their hosting plans come with a wide range of features and their servers are optimized for speed and performance. With 24/7 customer support and a 30-day money-back guarantee, there’s very little downside to trying out Hostinger for your hosting needs.
How to purchase Hostinger Hosting
Are you looking to purchase web hosting for your website? If so, Hostinger is a great option to consider. Hostinger is known for its affordability, reliability, and excellent customer service. In this article, we’ll guide you through the process of purchasing Hostinger hosting.
Start Your Blog Today & Get up to 75% Discount with a Free .com Domain on Hostinger using this link only: https://wpstudy.in/hostinger
I will give you GP Premium, WP Rocket, RANK MATH, Premium Blogging Secrete Course ( Worth $1000 )
(Send us your invoice and get $1000 worth of premium plugins, themes, and Premium Courses FREE For Your Success)
Email ID: [email protected]
Thanks
Happy Blogging journey
Step 1: Choose Your Hosting Plan
The first step in purchasing Hostinger hosting is to choose a plan that suits your needs. Hostinger offers several plans, including shared hosting, cloud hosting, and VPS hosting. Shared hosting is ideal for small websites, while cloud hosting and VPS hosting are better for larger websites with more traffic. Choose the plan that fits your requirements and budget.
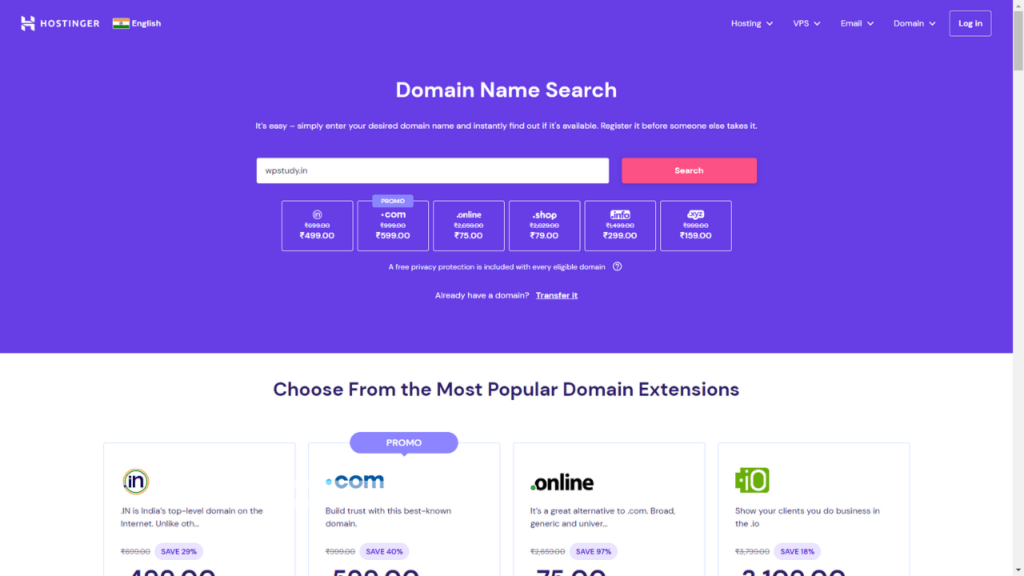
Step 2: Select Domain Name
Next, you will need to select a domain name if you don’t already have one. Hostinger offers a free domain for the first year with some of its hosting plans. You can also transfer an existing domain to Hostinger if you prefer. Choose a domain name that is relevant to your business or website and easy to remember.
Step 3: Review Your Order
Once you’ve selected your hosting plan and domain name, you’ll be taken to a page to review your order. Here, you can see the details of your hosting plan, the domain name you’ve chosen, and the total cost. Make sure everything looks correct before moving on to the next step.
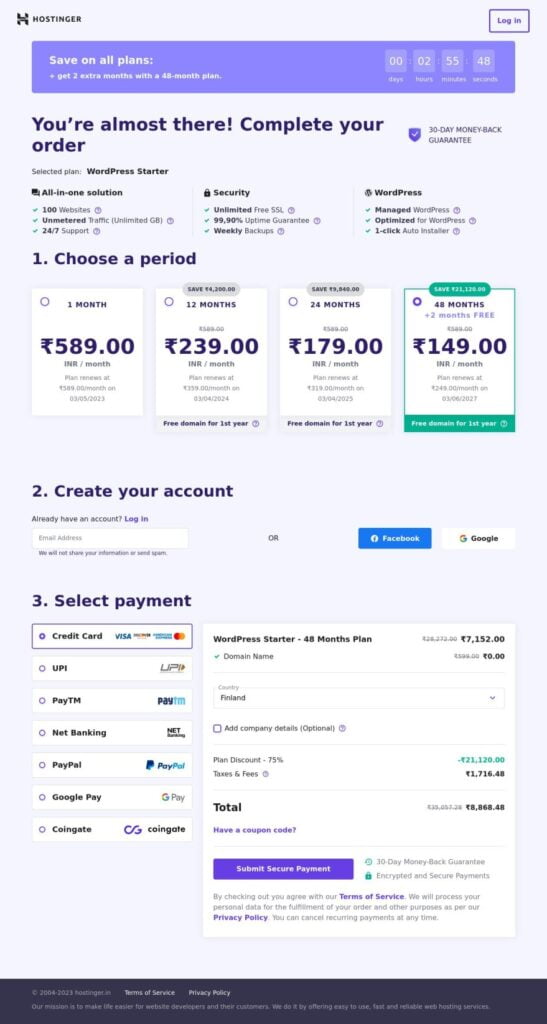
Step 4: Enter Billing Information
On the checkout page, you’ll need to enter your billing information, including your name, address, email, and payment method. Hostinger accepts various payment methods, including credit cards, PayPal, and Bitcoin. Choose the method that works best for you and enter your information.
Step 5: Complete Your Purchase
Once you’ve entered your billing information, review your order one last time before completing your purchase. After you click the “Pay Now” button, you’ll receive a confirmation email from Hostinger with your login details.
Congratulations! You’ve successfully purchased Hostinger hosting. From here, you can log in to your account and start building your website. If you need any help along the way, Hostinger offers excellent customer support that is available 24/7 through live chat, email, and phone.


Leave a Comment